Showing posts with label Warlord Games. Show all posts

Sunday, 31 December 2017

Bolt Action: US 1st Marine Corps


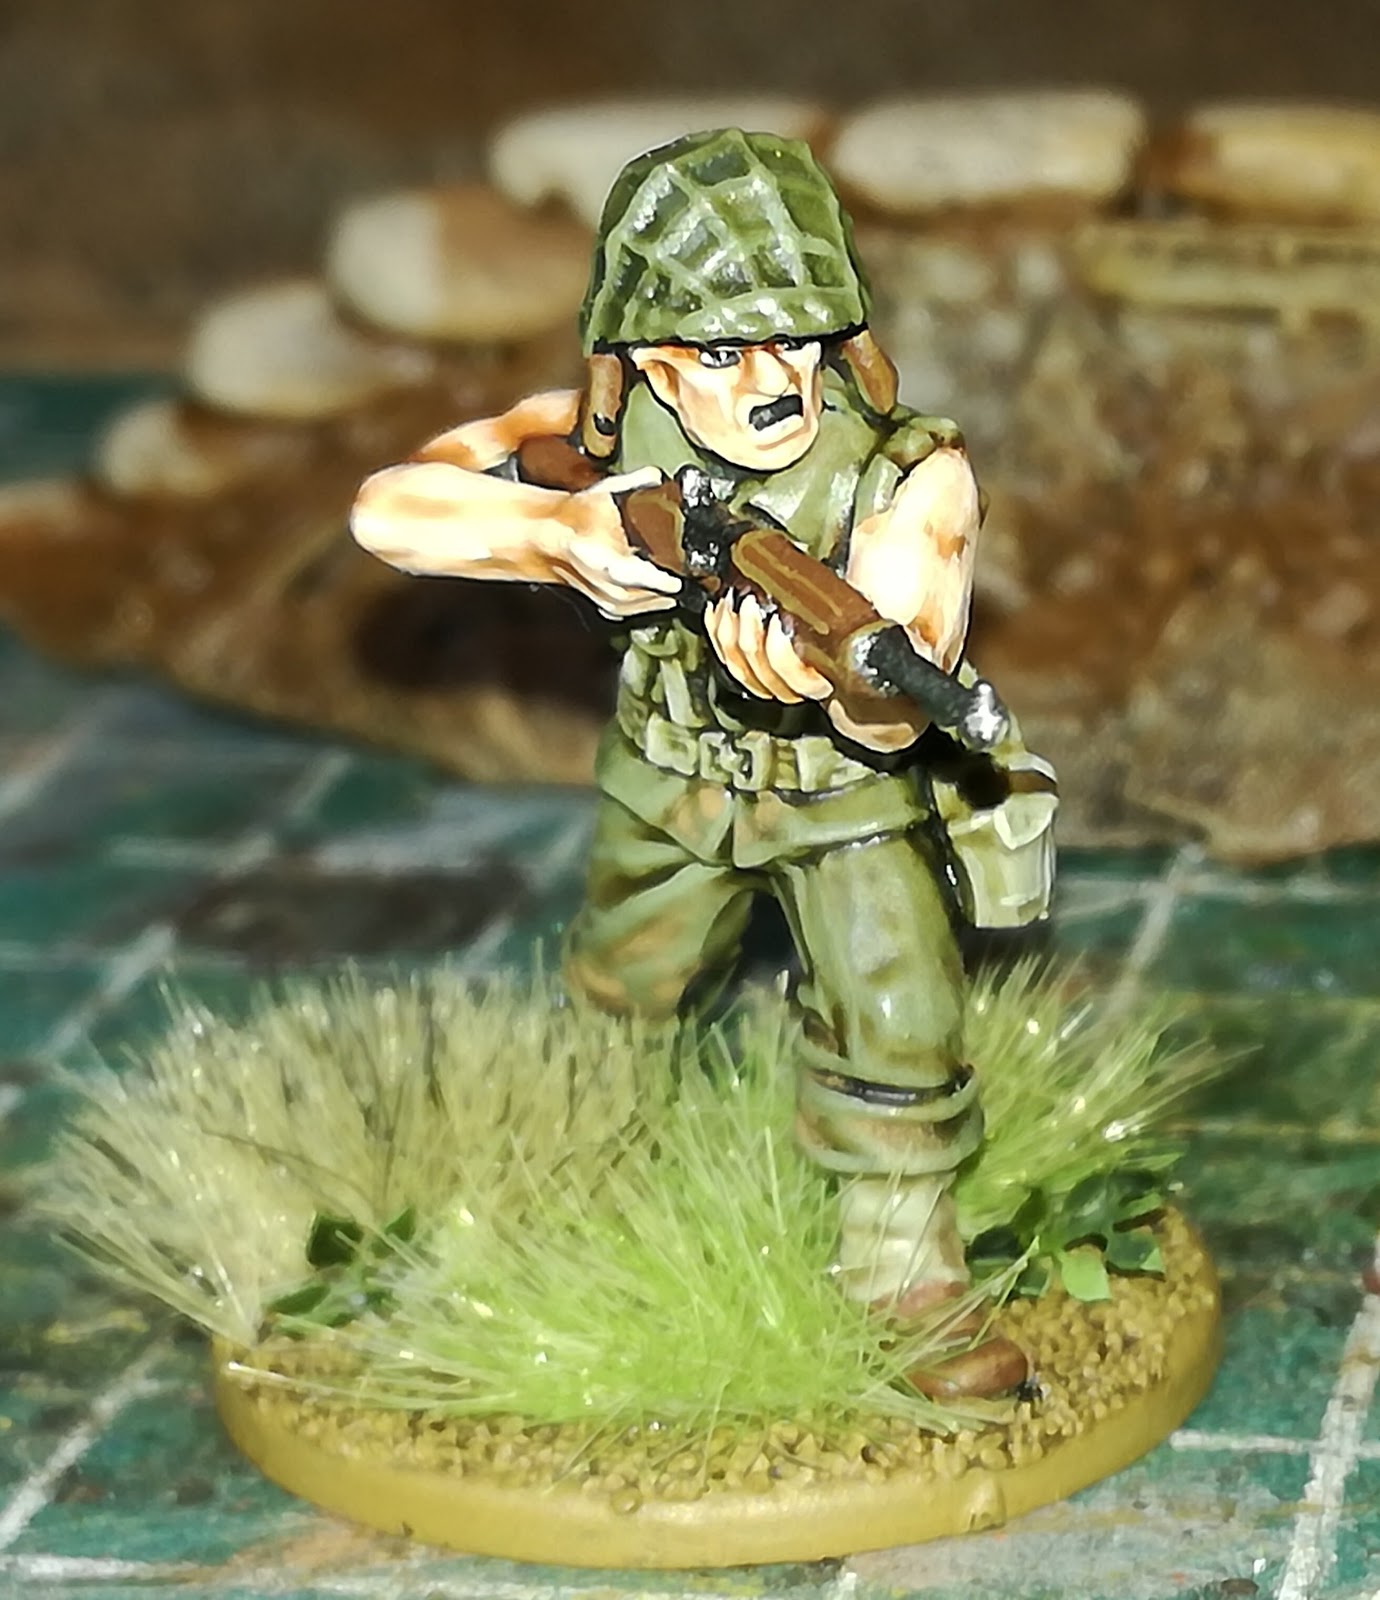
It's the final post of the year so I thought I'd sum up all my most recent progress on a new project, the US marines. I've had marines sitting in boxes around my house for years now. I first picked up a box of plastic guys when they were offered free with every purchase of the BA 2nd edition book. I then picked up some marine support weapons when they went on a flash sale about a year ago. Despite slowly accumulating marines, I hadn't gotten around to assembling or painting any. Until now.

So far I have completed 1 squad of 8 marines (ahem engineers with BAR's and a flame thrower), started another squad (engineers again), a Satan flame tank and a .30cal machine gun team. It's a modest start but a start nevertheless.

It took some time experimenting to get the uniform colours right. The Pacific conditions did horrible things to uniform colours so pinning accurate colours down was no easy task. Luckily, the internet is awash with helpful people willing to lend a helping hand. In the end I used Russian Army Uniform green as the base colour and highlighted it with mixes of Green Grey. The helmet cover is based with Cork Brown and highlighted with Pale Sand. The camouflage is simply two different shades of brown added in small blotches randomly.  

The bases have been embellished with jungle tufts and a second darker tuft. I also added paper foliage from Mig and some plastic ferns from a German train scenics manufacturer. 

That's it from me this year. Cycle down for commentary on the different units I have finished.


This machine gun team is made by the Assault Group. They're great figures but the faces can be a bit 'flashy', which damages them during clean up. This leads to some disfigurement and dodgy looking expressions! Regardless, the uniform and gun quality was top notch and it gives me some variety over the Warlord Games version.


I also converted a Stuart Satan from the Warlord plastic kit. This was an extremely simple conversion. Simply a barrel replacement and that was that! The kit came with the optional external fuel tanks, which was brilliant. Thank you for that Warlord. 


Saturday, 28 May 2016

M4A3 Sherman (76mm). 'Down Necker'


Hi all, my crusade to renovate the tanks in my case has continued this week with a Warlord Games 76mm Sherman with wooden armour. Before I began, she was a tad boring. No pin-up, only one weathering powder application and no grass tufts meant she stood out amongst my other vehicles. Therefore, I decided to bring her back up to scratch. First, I tidied up all the dents and scratches that had occurred through use in the case. Then, I applied several alcohol based washes of weathering powders to the various areas of the tank. Next, I applied the 'Down Necker' decal to the space I'd left free the first time around. I also brushed on a few layers of weathering powders dry. I was sceptical that this would work at first but I am now pleased with the results. Finally, I added two colours of grass tufts to the base. I'm hoping to add additional stowage to this vehicle when the Rubicon stowage set is released!


Sunday, 15 May 2016

M26 Pershing. Bessy gets a makeover


I've continued to root through my army case for vehicles that need a little touch up and a little repair. Consequently, I came across my M26 Pershing, a model I bought at the beginning of my journey into Boltaction.

I bought the model at the Derby Games Convention because friends of mine wanted to take advantage of the 10% off for 3 models deal! I came away with a Pershing and my friends picked up a Tiger II and an IS-2.

Unfortunately, the M26 is way too expensive for regular games of Boltaction and so it's seen very little use. It is a cool tank though, so I might try and write a list to incorporate it.

Anyway, I took it out of the case and gave it some TLC over the weekend. It was a bit chipped in places and the weathering wasn't quite up to scratch. The base was also quite large so I trimmed that down. I like tanks on bases but they can sometimes get in the way so the smaller the better.  

So there we have it, another tank refreshed and back in service. Let's see what I can find next...

Sunday, 8 May 2016

M36B1 Jackson. It's finally painted!

So it seems that I've a couple of tanks sitting on my painting table for what feels like an age! Fortunately, this Jackson is the last (before I build the 2 tanks I still have in boxes!) and I'm mightily relieved to finally have it gone.


Sadly, it's unlikely to see much table time on account of it's crazy points cost but I'm sure it will make at least a few appearances in tank wars games. We shall see.
 I really like crew models in the turrets of tanks but these guys took forever to paint! They add life to the vehicle but I'd be lying if I claimed to enjoy painting them.
This vehicle does of course join the ranks of my fictional tank unit, the Warbirds. Unfortunately, she doesn't yet have a name or a pin-up. That's a job for another day I think.
 

Monday, 2 May 2016

Dutchess! M4A3E2 Sherman Jumbo

It feels like I've had this Sherman Jumbo model from Blitzkrieg Miniatures on my painting desk for an age! For one reason or another, I have not been able to muster enough energy to finish it off. Well, as my teacher training enters its last leg, I found some time and incentive to finish it off for good. So let me introduce the newest addition to the Warbirds tank company, Dutchess!

 She's been painted in the usual way, using Vallejo Model colours and Forgeworld weathering powders. 
 No pin-up model on this one but her name is emblazoned loud and proud on the side.  
 The cast of the modal was unfortunately slightly damaged on the sides as you can see above. Rather than correct the defect, I decided to leave it as war damage. After all, anyone familiar with the Jumbo in World of Tanks knows that shells can ping off this machine all day long.  
 I also included a Warlord Games tank commander in the turret for good measure.

Tuesday, 12 April 2016

M20 Scout Car: Rubicon kits continue to impress me!

The thing that's interesting to me about collecting a historical force is that I personally have not lost any motivation to continue expanding my collection for a single army (or Nation in this respect). When I was in full swing of collecting 40k miniatures, I would plan an army and then progressively buy and paint the units that I'd planned for. Then I'd play around with it a bit until it worked for me and that's how the army would stay, usually for a year or so, before I sold it and started again with another new idea.

Conversely, I've now been playing Bolt Action for around two years and I'm still not bored of collecting units for my US army. It doesn't even seem to matter if they're good units in the game or not (although I do still enjoy the competition of building competitive armies in competitive environments). Even so-called boring units like riflemen keep getting painted. My US force is growing and growing all the time and it doesn't seem to be showing any signs of stopping. It'll be interesting to me to see when the momentum runs out but that's enough of my musings for now, I have an M20 scout car to show you.


The kit is from Rubicon, one of my favourite 1/56 scale vehicle producers, and as usual the kit was a joy to build.  The details are very nice and there are a few options to choose from such as the inclusion of a mine rack or a storage compartment. One particularly pleasing detail was the flattening on the tires, which helps basing the model and also demonstrates the weight of the vehicle.

The only issue with Rubicon kits is the lack of crew figures, which in fairness is an issue they are working hard to remedy. Until then, I've used a Warlord Games US tank crew gunner to operate the .50 cal and a Westwind half-track crewman to sit inside the vehicle interior. I also added some Allied stowage from Warlord Games to the exterior to make the armoured car look a bit more lived in.

Finally, a continued use for the awful Westwind half-track crew figures!

The model was painted using my usual combination of Vallejo Model Color paints and Forgeworld weathering powders. I have the base still to finish but otherwise, the model is complete. Hopefully an 80pt HMG with recce proves useful in the game!  

Wednesday, 30 March 2016

Upgrading to a 'big boy' mortar: 4.2" chemical mortar


Goodness me it must be Christmas as I'm actually following up on my promises! Yesterday I said that I would be building and painting a US 4.2" heavy mortar from scratch and then sharing the results with you. Well, as expected, that's exactly what I did and it's exactly what I'll do.

First, here's the mortar before paint. I built it from some random bits I have left from a 1:35 scale Abrams tank kit and plasticard. It was a little bit fiddly to put together but wasn't altogether complicated.


This image of a real heavy mortar is what I used to base most of the details on. It's 'more or less' accurate and I think it's fine for table-top standard. There seems to be some variety in the construction of these mortars from looking at different pictures so the little differences shouldn't be too bad. 


Here it is with some crew models. I've used crew from other guns that I had. They fit in fine except for the bazooka loader, who's bomb is far too small for the mortar. See the historical picture above for reference to shell sizes. Perhaps I'll scratch up a new loader if I have time. 

 I thought it would be of some use to compare the sizes of the small, medium and heavy mortars. I'm a little concerned that my heavy mortar is too big. Having said that, I don't think it's 'silly' too big, especially when looking at the reference photo above. Let me know what you think.